
via one of my favorite blogs The Glamourai. This girl has got it together....
i love the look of estate jewelry, especially articulated rhinestone pieces that have developed a smokey patina over time (like the yummy stuff above!). unfortunately, such gems can be either hard to find or stunningly expensive. on the other hand, modern replicas may be more affordable, but they often lack a certain depth ~ to my mind, new, too-shiny jewels always look cheap. good thing i've got a trick for faking the estate look!
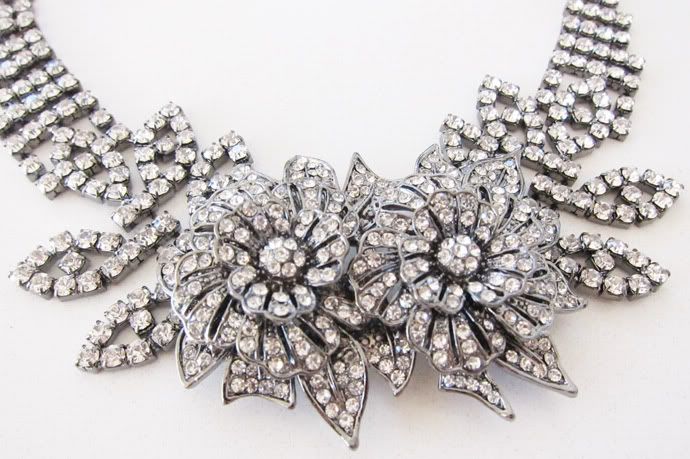
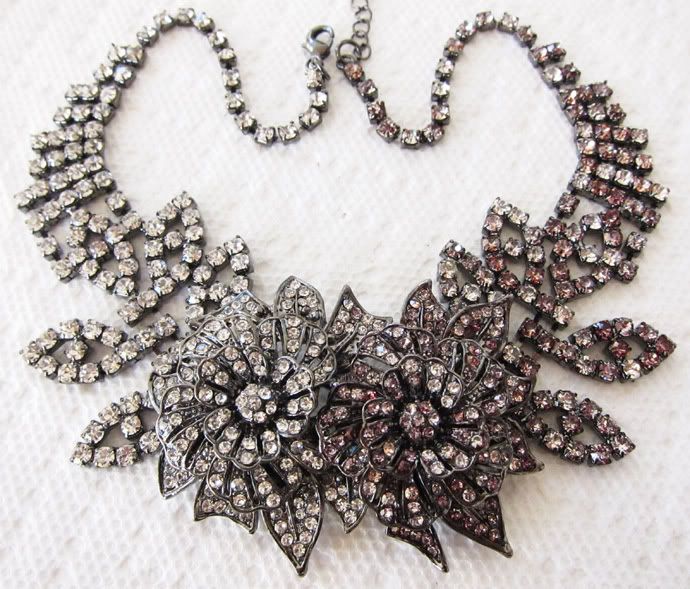
here's what you do: start with a rhinestone necklace (or earrings, bracelet, etc...). recently, i fell in love with this 3D floral stunner while culling pieces for my f21 store. although it's undoubtedly a pretty piece as is, i imagined it might be a bit too glitzy ~ even for my taste! however, i knew it would be perfect for this project.
other than that, you'll need:
- paper towels to protect your work surface
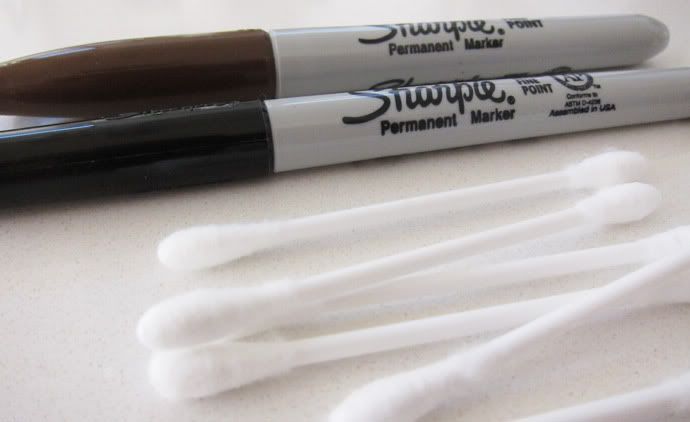
- a black AND a brown sharpie pen (fine point is preferred)
- a handful of Q-tips
- nail polish remover (optional)
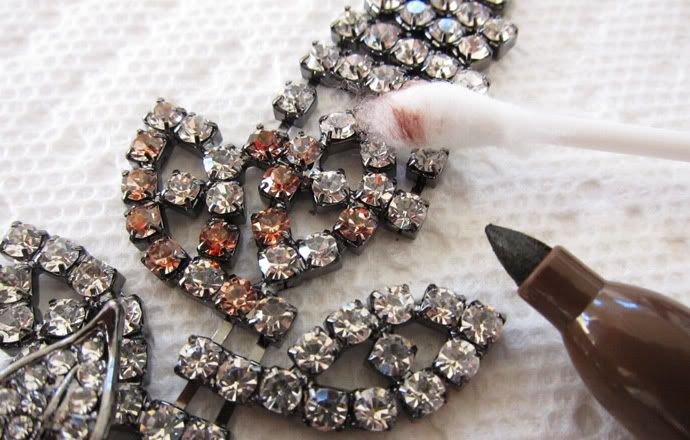
first and foremost, cover your workspace with paper towels; permanent marker does NOT come off tabletops! next, start smudging brown sharpie over the stones; to get that naturally aged look, occasionally skip a stone or two. you want it to look a bit random (as organic aging tends to be). blot the ink up with a moistened Q-tip (dipped in water!) as you go:
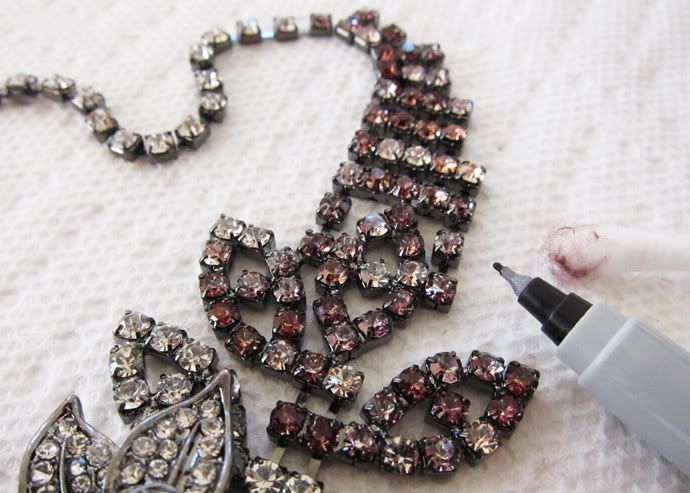
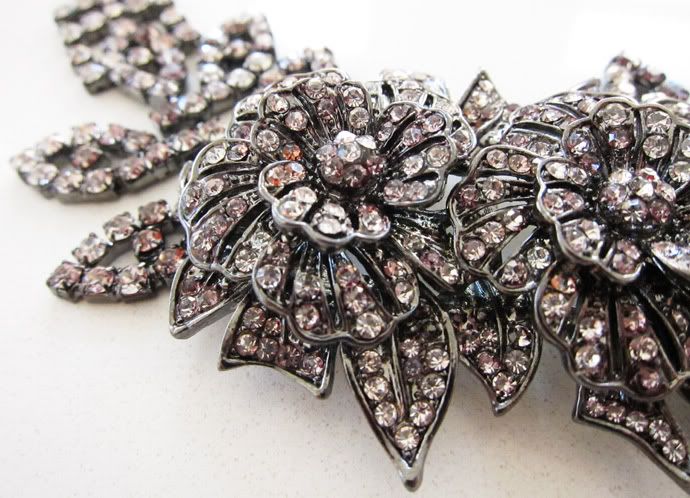
next, trace back over the stones with the black sharpie (continuing to blot with damp Q-tips as you move along). layering black over the brown adds dimension, making the stones look more naturally smokey:
for the sake of this tutorial, i completed the right side first, so that you'd be able to compare the desired finish with the original starting place (ie, the left side):
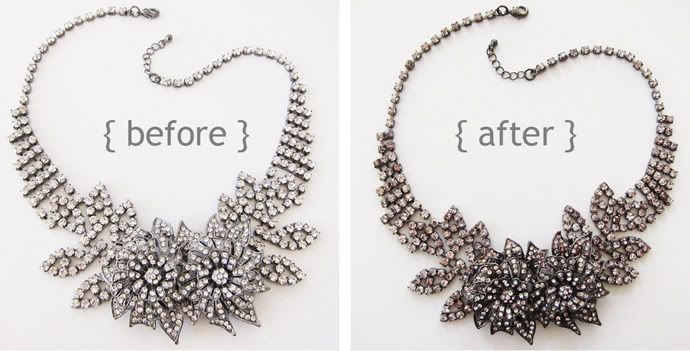
after continuing the same work on said left side, i realized i'd gone a bit too dark overall. that's easy to do ~ but just as easy to fix! simply dip one of your Q-tips in a bit of nail polish remover, and sweep it over the top surface of the stones. use a light touch on this step ~ that will help bring the shine back to the tips of the piece, while maintaining the shading around the sides of the stones. and voila! that's all it takes:
see the difference?! this transformation is definitely (intentionally) subtle; because, as we all know, chic is in the details!
let me know in the comments if you have any questions, and send me pictures if you decide to test this out for yourself!! as always, please keep in mind that you don't have to buy anything new to do this project ~ just dig around in your jewelry box for anything a bit too blingy and try giving it the antique treatment!
here's what you do: start with a rhinestone necklace (or earrings, bracelet, etc...). recently, i fell in love with this 3D floral stunner while culling pieces for my f21 store. although it's undoubtedly a pretty piece as is, i imagined it might be a bit too glitzy ~ even for my taste! however, i knew it would be perfect for this project.
other than that, you'll need:
- paper towels to protect your work surface
- a black AND a brown sharpie pen (fine point is preferred)
- a handful of Q-tips
- nail polish remover (optional)
first and foremost, cover your workspace with paper towels; permanent marker does NOT come off tabletops! next, start smudging brown sharpie over the stones; to get that naturally aged look, occasionally skip a stone or two. you want it to look a bit random (as organic aging tends to be). blot the ink up with a moistened Q-tip (dipped in water!) as you go:
next, trace back over the stones with the black sharpie (continuing to blot with damp Q-tips as you move along). layering black over the brown adds dimension, making the stones look more naturally smokey:
for the sake of this tutorial, i completed the right side first, so that you'd be able to compare the desired finish with the original starting place (ie, the left side):
after continuing the same work on said left side, i realized i'd gone a bit too dark overall. that's easy to do ~ but just as easy to fix! simply dip one of your Q-tips in a bit of nail polish remover, and sweep it over the top surface of the stones. use a light touch on this step ~ that will help bring the shine back to the tips of the piece, while maintaining the shading around the sides of the stones. and voila! that's all it takes:
see the difference?! this transformation is definitely (intentionally) subtle; because, as we all know, chic is in the details!
let me know in the comments if you have any questions, and send me pictures if you decide to test this out for yourself!! as always, please keep in mind that you don't have to buy anything new to do this project ~ just dig around in your jewelry box for anything a bit too blingy and try giving it the antique treatment!
images via
No comments:
Post a Comment